


Happy Monday everyone! How was your weekend?
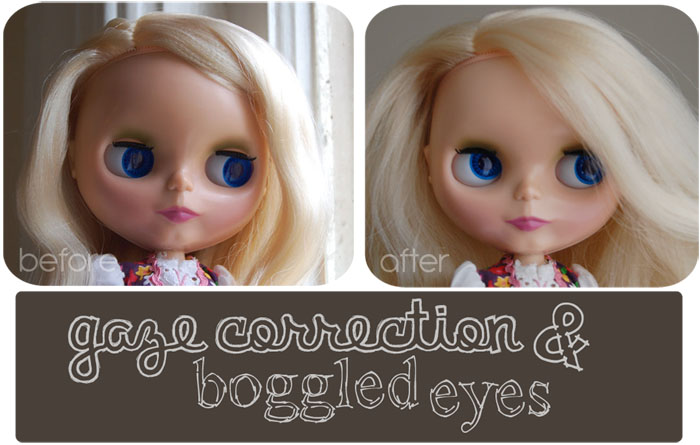
I've been working on my Blythe doll (still nameless) and I wanted to share my progress with you guys! I started working on her right away last week. I set out to do gaze correction and boggled eyelids first. In order to do this, you have to open the head...so don't be alarmed at the pics you're about to see, lol. It's all part of the process :)
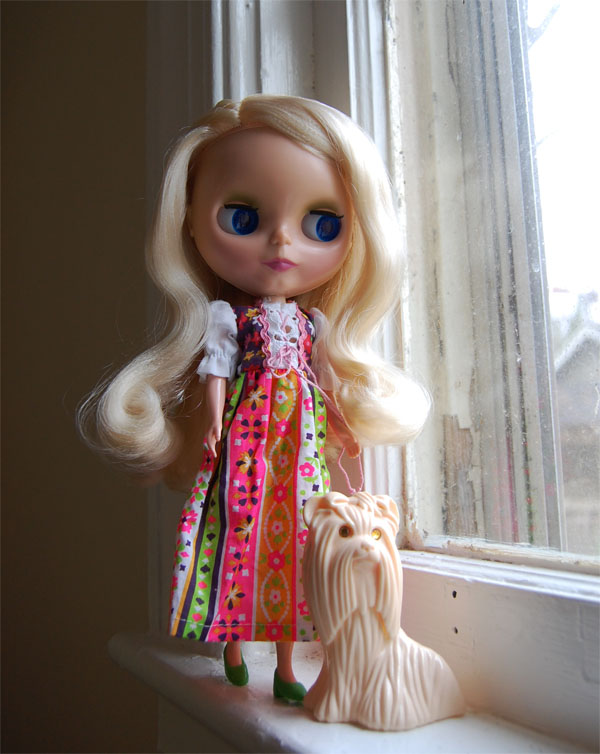

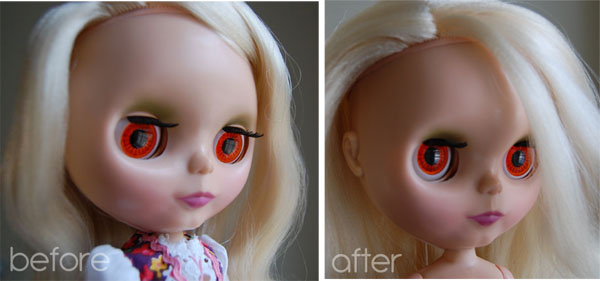
Here she is right out of the box before anything was done. Isn't she cute?...you can see how her gaze is downward.

In order to open the head, you have to get the scalp off. They glued hers on TIGHT, argh!
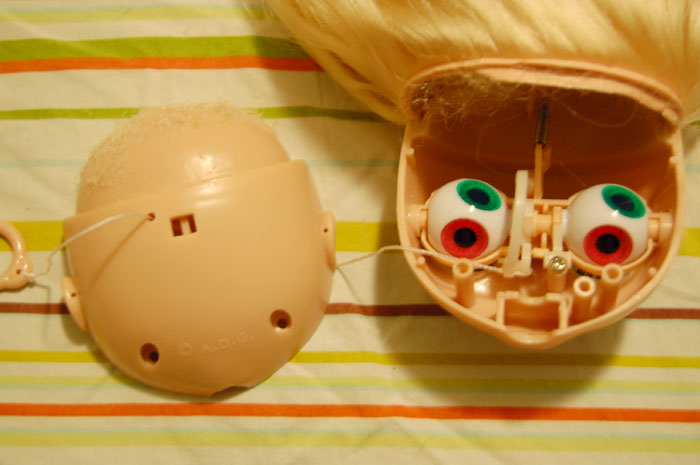
After a lot of prying & a little snipping of the glued on hair, I finally got the head open...


Getting the head off was not easy for me. I'd read that they use tons of glue on ADG heads (as you can see from picture #3) and it's hard to get the scalp to detach from the dome so I wasn't surprised. But I read that if you only want to work on her eyes, you just need to get the back half of the scalp off, so that's what I did. Her scalp is only open from ear to ear. The front is untouched. They say you want to try and preserve as much of the flange (that rubbery part you see sticking down from her hair line in picture #4) as you can so that it's easier to glue the scalp back on. I tried my hardest but that stuff was glued in there TIGHT! But I preserved some of it so I'm not worried about it for now. Her scalp is going to stay unglued until I'm done with most of her customizations and her hair covers it anyway, so no biggie.
Once the head was open, I removed her T-bar (see that tiny screw next to her right eye in picture #4? It's holding down a piece of plastic that determines how high her eyes look.) I took that out and shaved 1 mm off of it with an x-acto knife. It worked well and I'm thinking about taking a little more off so that her eyes are even higher. To give her boggled (lifted) eyelids, I had to take the eye mechanism all the way out of the head (picture #5 & 6). This wasn't too hard. I've found that if you just take your time and work slowly, you will not break your Blythe's parts. You have to be firm but gentle all at the same time and I think this is why so many people are nervous to do it. You really don't know how much force you'll need until you do it and that's the nerve wracking part! Once the eye mechanism was out of the head, I had to disconnect the eyes from the lids and then shave a 1 mm cube out of the back of both eye lids. This was SO nerve wracking! You don't want to take off too much, but you have to take off enough for it to work. I just took my time, shaving a little at a time and it worked :D
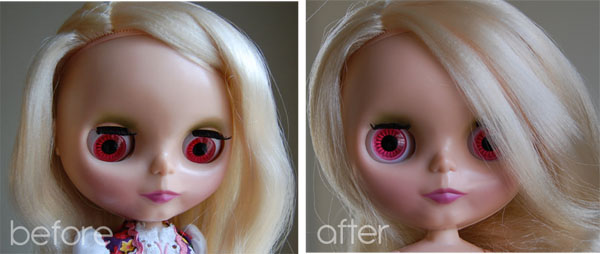
Here's the finished product on all 4 eye chips (she's had her hair combed too, lol):

Up next on the list is going to be sand-matting her face & some carving on the face (lips, nose). If you'd like to see more pictures of my Blythe, please visit the I ♥ Blythe set on my Flickr. I've been taking so many pictures that I post them all here, lol. ;) Enjoy your day!
♥MK
 & this blog is under construction. excuse any weirdness you see!
blog design by the most awesome:
& this blog is under construction. excuse any weirdness you see!
blog design by the most awesome:


4 lovely readers said...:
I don't know much about these dolls, so I didn't know how much you could customize them! That's awesome. They are definitely cute!
Wow- I would die of nerves!! I like the eyes a lot better after your customization- I cannot wait to see more- love all the pictures too- it is so interesting to see the steps behind the customization♥
What a fabulous start!!! Now I want one - thanks a bunch lol :oP
Great work! I would've been to scared to mess with all that. haha
Post a Comment